Participants are advised to install this software well in advance and familiarise themselves with the environment. Note that this section will be frequently updated, so check back here regularly.
To help with the installation of the software there will be helper sessions:
-
Tuesday 9 September 10:00-11:00 CEST
-
Wednesday 10 September 15:00-16:00 CEST
Installing CASA
Note: due to issues with the Linux and Mac OS, we will be using different versions of CASA (v6.5.4 on Linux and 6.6.5 on Mac OS). They are functionally the same, but please follow the instructions below carefully.
Linux
Please use the following link to download the CASA version for your Linux distribution
- Once downloaded, extract the package into an appropriate folder. E.g., you can use the tar command in the command line / terminal to do this:
-
tar xvf casa-6.5.4-9-pipeline-2023.1.0.125-py3.8.tar.xz - This will make a folder named
casa-6.5.4-9-pipeline-2023.1.0.125in the directory you extracted in. - You can run CASA by running
casa-6.5.4-9-pipeline-2023.1.0.125/bin/casain your command line. - An easier way is to set a bash alias so that you can run CASA by just typing
casainto the command line (from anywhere!). This can be done using the following code (where you want to replace(path_to_CASA_folder)with the CASA folder path (you can find your current path with the commandpwd). Note that this command will modify your.bashrcfile in your home directory by adding a line at the end of the file:For example, if I untarred CASA in my home folder, this command would beecho 'alias casa=(path_to_CASA_folder)/casa-6.5.4-9-pipeline-2023.1.0.125/bin/casa' >> ~/.bashrcecho 'alias casa=/home/radcliff/casa-6.5.4-9-pipeline-2023.1.0.125/bin/casa' >> ~/.bashrc - Test that this alias works by opening a new terminal and type
casainto it. This should open up CASA and the logger window.
Mac OS
- Please use the following link to download the correct CASA version for your Mac OS version. Note that the ARM corresponds to the Apple Silicon systems (i.e. designated as the M1, M2 and M3 processors). If you have an Intel system install the ARM Mac OS 12 / Intel CASA.
- Open the Terminal and type in the following command. This will create a directory named
datainside the hidden casa configuration directory in your home foldermkdir ~/.casa; mkdir ~/.casa/data - You should have already downloaded a disk image file (
.dmg) file that should be similarly named ascasa-6.6.5.31-XX.0-py310.dmgwhere the XX corresponds to your Mac OS version. - Open the Finder and double click on the file to get it to mount. This opens another Finder window where there will be CASA and a README.md file.
- Open another Finder window and open the Applications folder. Copy CASA (or drag and drop) into the Applications folder
- Within the applications folder, right click and open CASA so that we can override the Apple security safeguard. If this doesn't allow you to open first time, try again. This should finish with a Terminal window opening and the CASA prompt present.
- Within the CASA prompt type:
!create-symlinksand follow the prompts. - Leave the CASA window open, and go to System Settings → Privacy & Security → Full Disk Access and make CASA, and the Terminal apps have full disk access.
- Once complete, close CASA and the Terminal app completely (i.e. right-click on the Mac dock to quit). Open a new Terminal tab/window and type in
casa. This should open up CASA and the logger window. - The CASA viewer has been discontinued on Mac OS, therefore we need to install the new casagui so that you can do interactive cleaning. Enter the following command in the CASA prompt to install it:
!pip3 install casagui==0.3.70
If these steps have run with no errors, please follow the instructions below to test your CASA installation.
Testing your CASA installation
Test all CASA functionality
In the first part, we shall ensure that all the parts of CASA are working properly.
- To begin, make a directory called something like ERIS2024 somewhere with at least ~10GB of disk space. Do not run CASA or work inside your CASA installation.
- If you haven't already, download the calibration tutorial to this folder using the following link
or enter the following in the command line / Terminal to download these data,
wget https://eris2024.iaa.csic.es/data/ERIS24_calibration_tutorial.tar.gz - On the command line ensure that you are in the same folder as the
ERIS24_calibration_tutorial.tar.gzfile and extract the contents by doing,tar -zxvf ERIS24_calibration_tutorial.tar.gz - This should make a folder called
ERIS24_calibrationwhich you should change directory (cd ERIS24_calibration) into. - Start CASA. Depending on your installation this may have different routes.
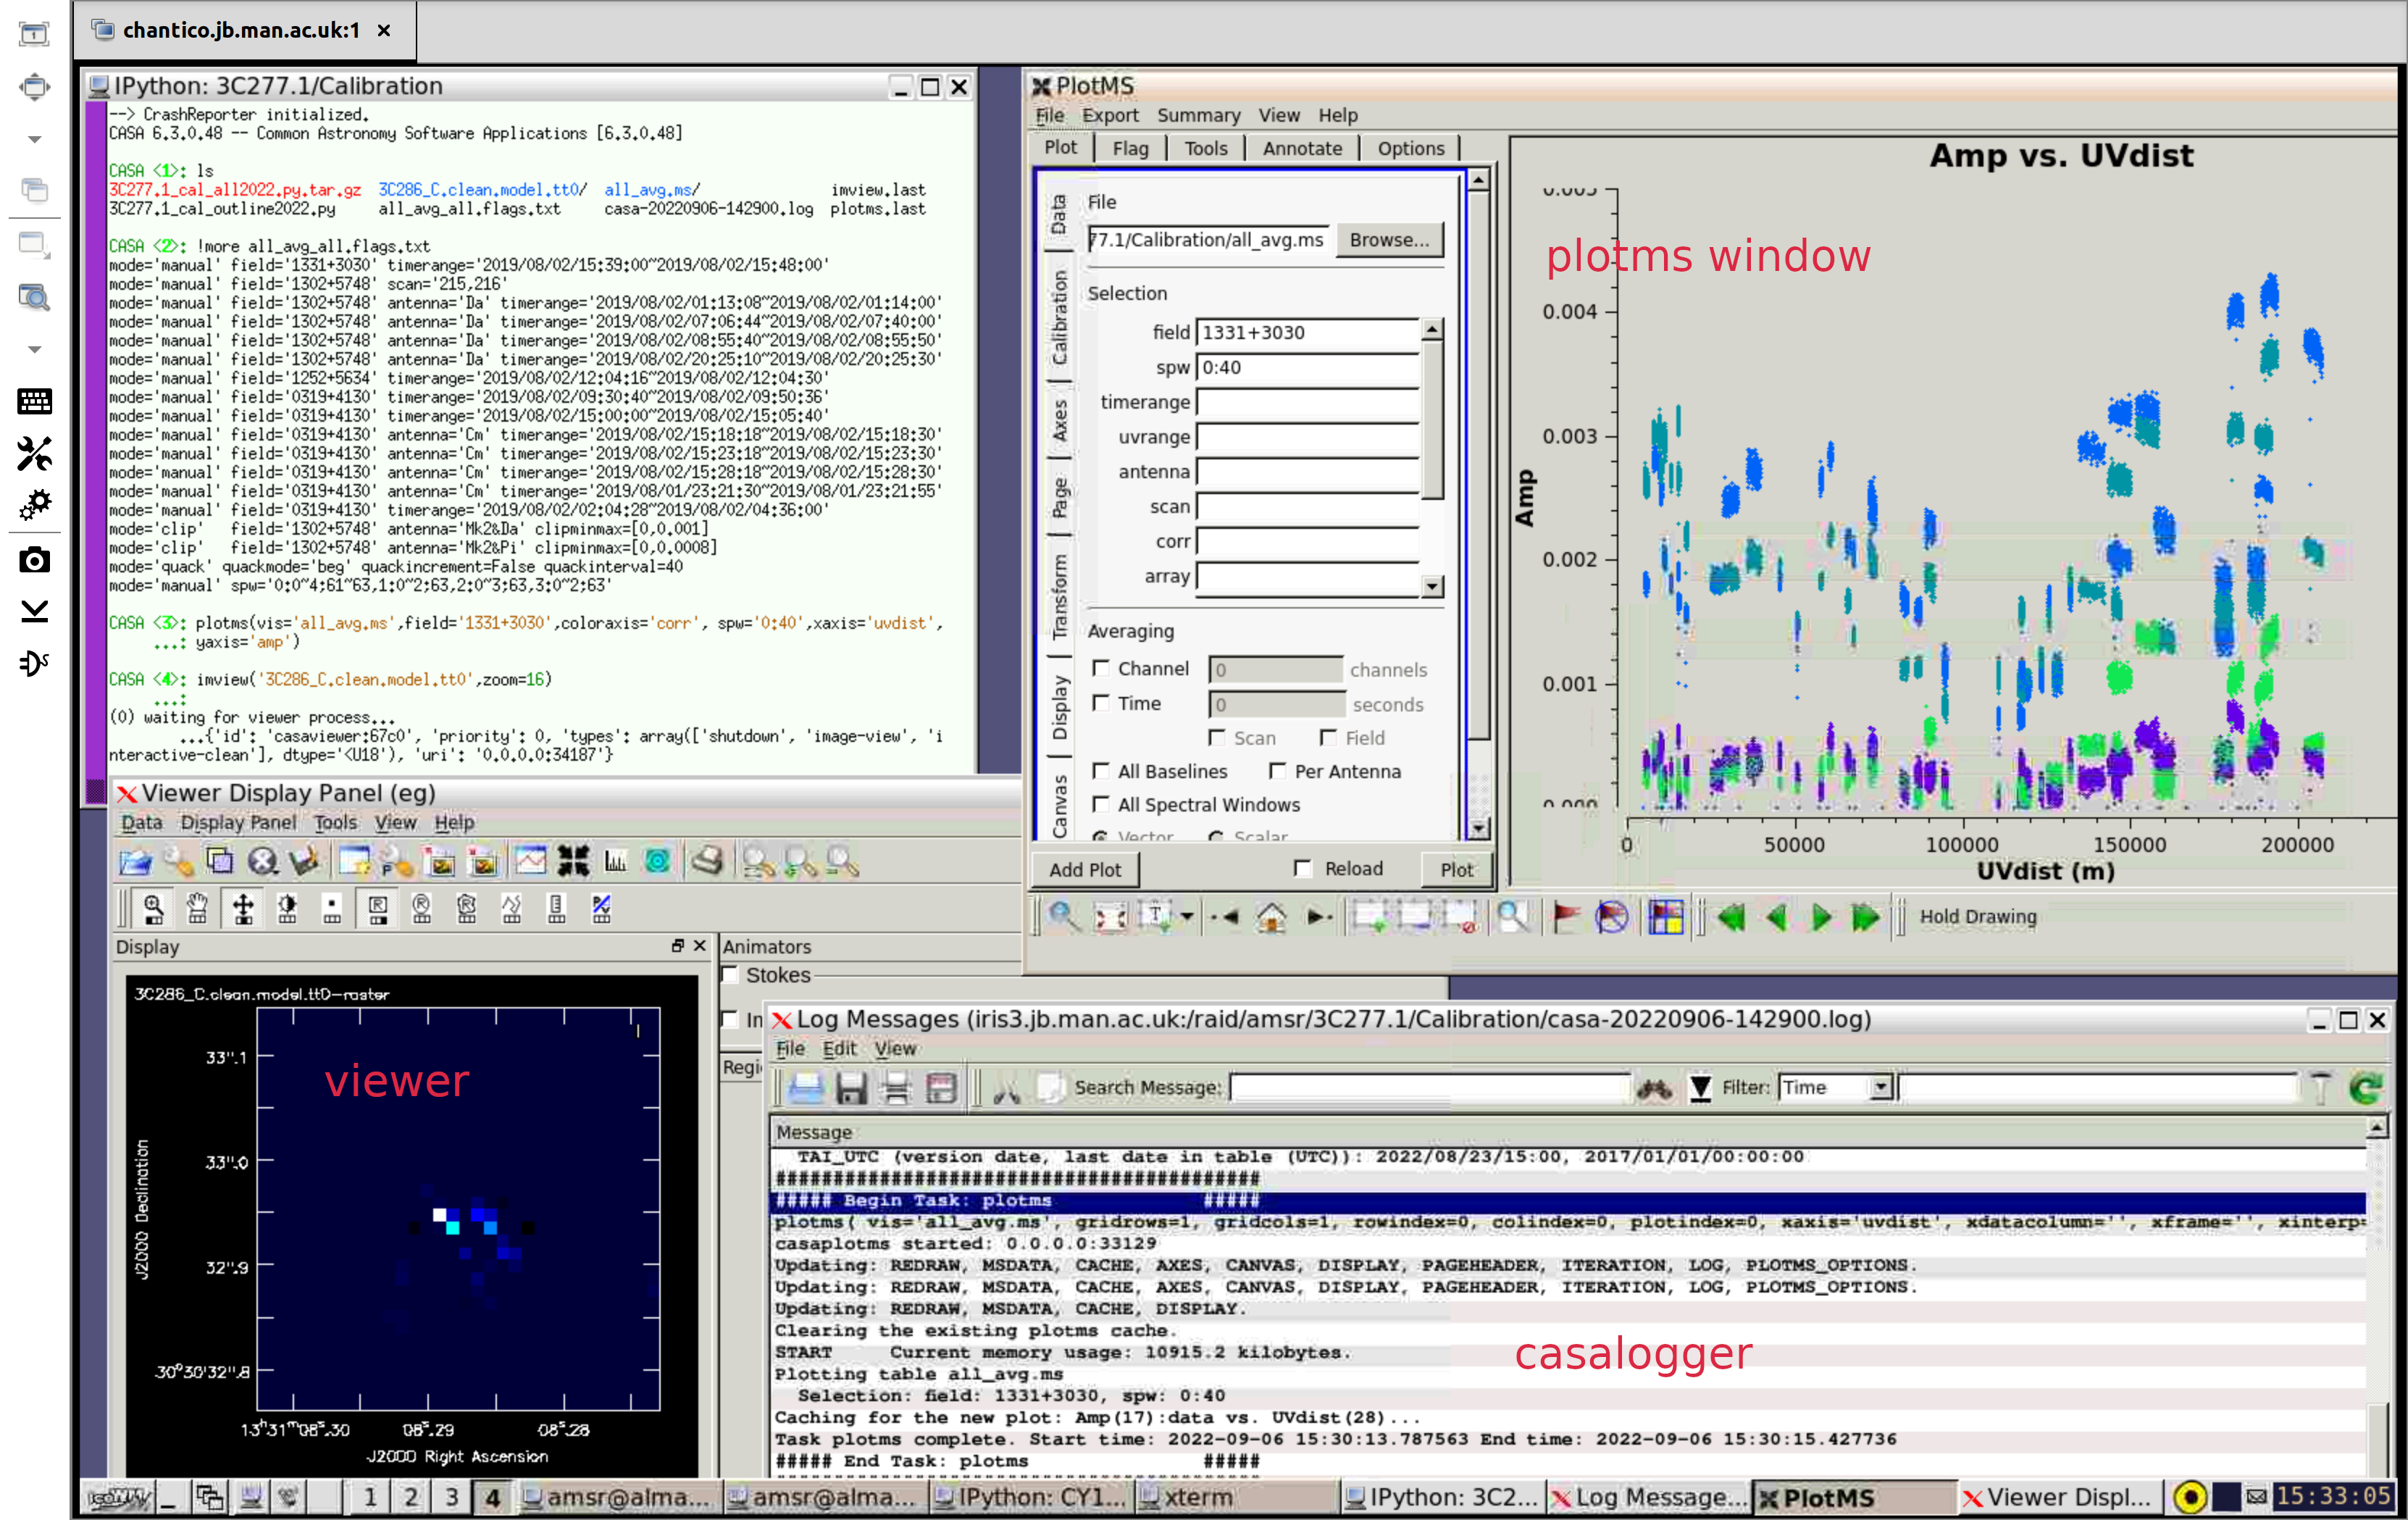
- You should see a logger appear, as in the Figure below, bottom right. Whenever you are running a CASA task always check the logger messages. These are saved as
casa<timestamp>.log, e.g.,casa-20220906-142900.log. - You can use simple shell commands inside CASA, e.g., type
lsor more demanding commands prefixed by!, e.g.,(see the Terminal on the top-left in the Figure below)!more all_avg_all.flags.txt - Test that the displays are working by entering,
N.B., If entering all the parameters for a task at once like this, or in a script, separate them with commas.
plotms(vis='all_avg.ms',field='1331+3030',coloraxis='corr', spw='0:40',xaxis='uvdist',yaxis='amp') - This should produce the display in the top-right of the figure below.
For Linux users only:
- Try opening the viewer GUI using the following command,
imview('3C286_C.clean.model.tt0',zoom=16) - This should produce the display in Fig. 1 lower left. The exact colours and panel layout may be different but if you don't have the casalogger and the plotms and viewer windows at all or they are unreadable, consult the CASA debugging pages or your sysadmin.
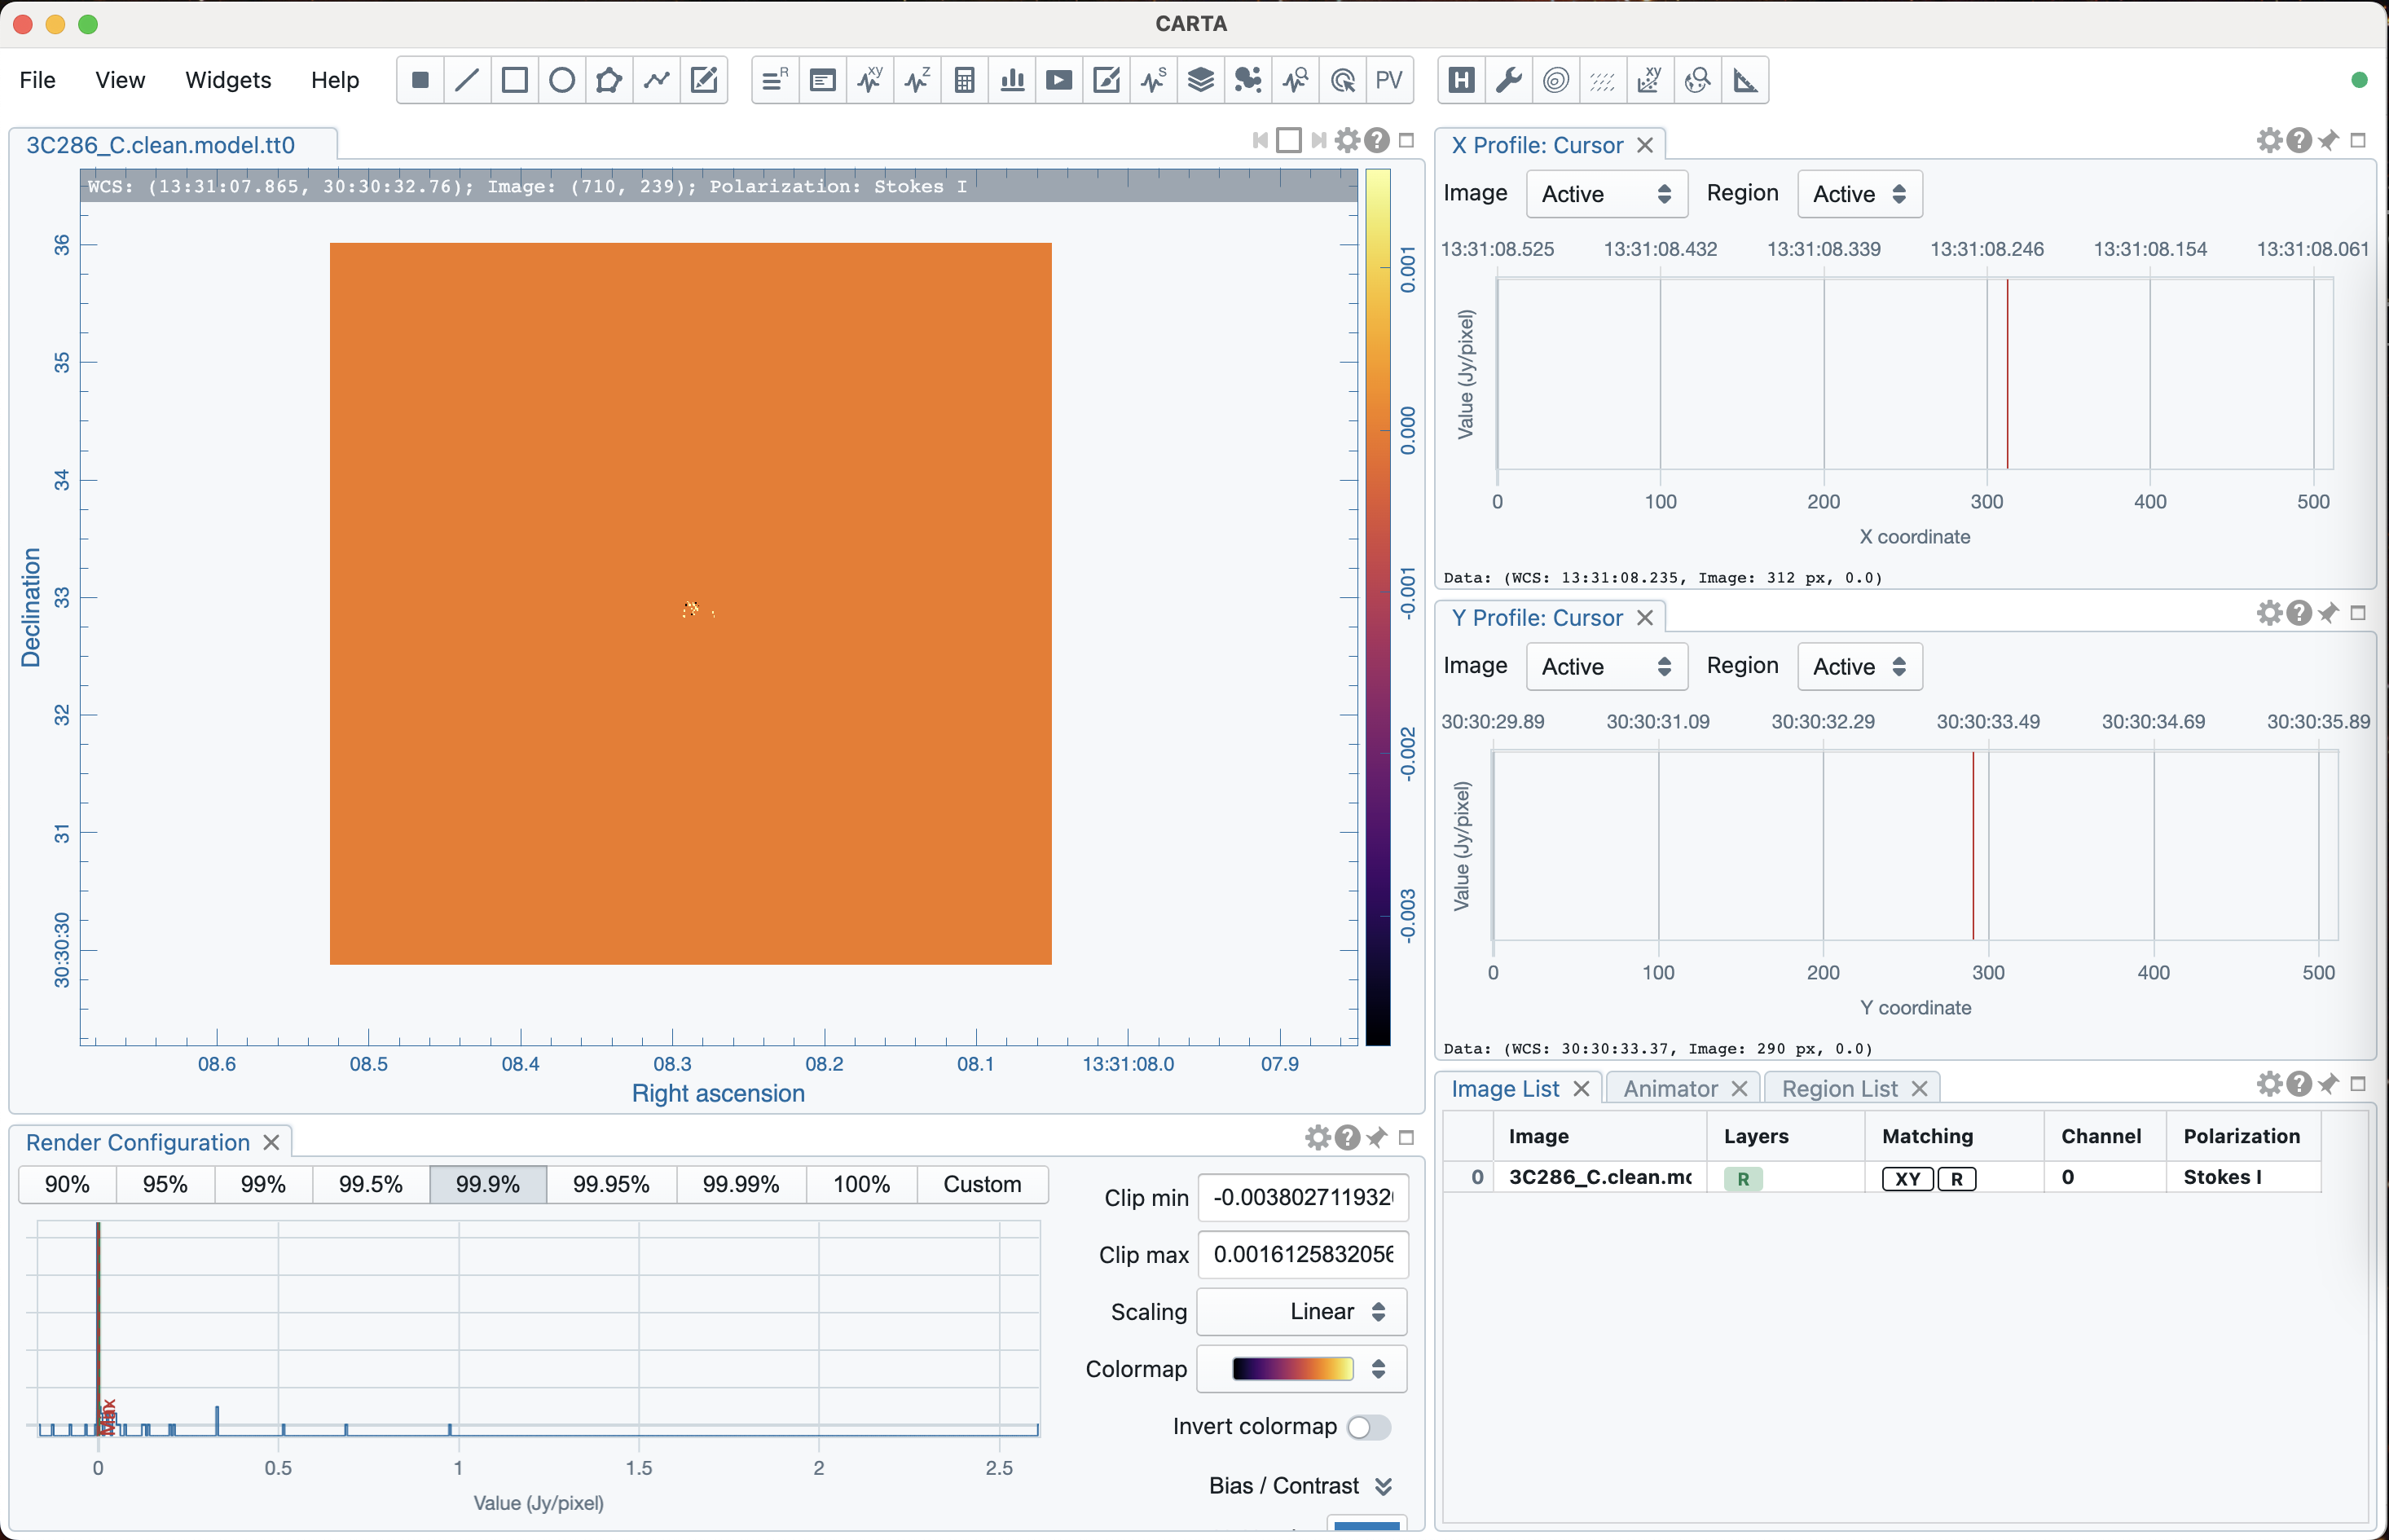
For Mac users only:
- In a new terminal tab/window, run the following command to open CARTA (if you have set the alias correctly)
cartaotherwise open the CARTA Application. Open3C286_C.clean.model.tt0(which is located in the ERIS24_calibration folder) and you should see a window appear that is similar to that shown in the left-hand panel of the Figure below.
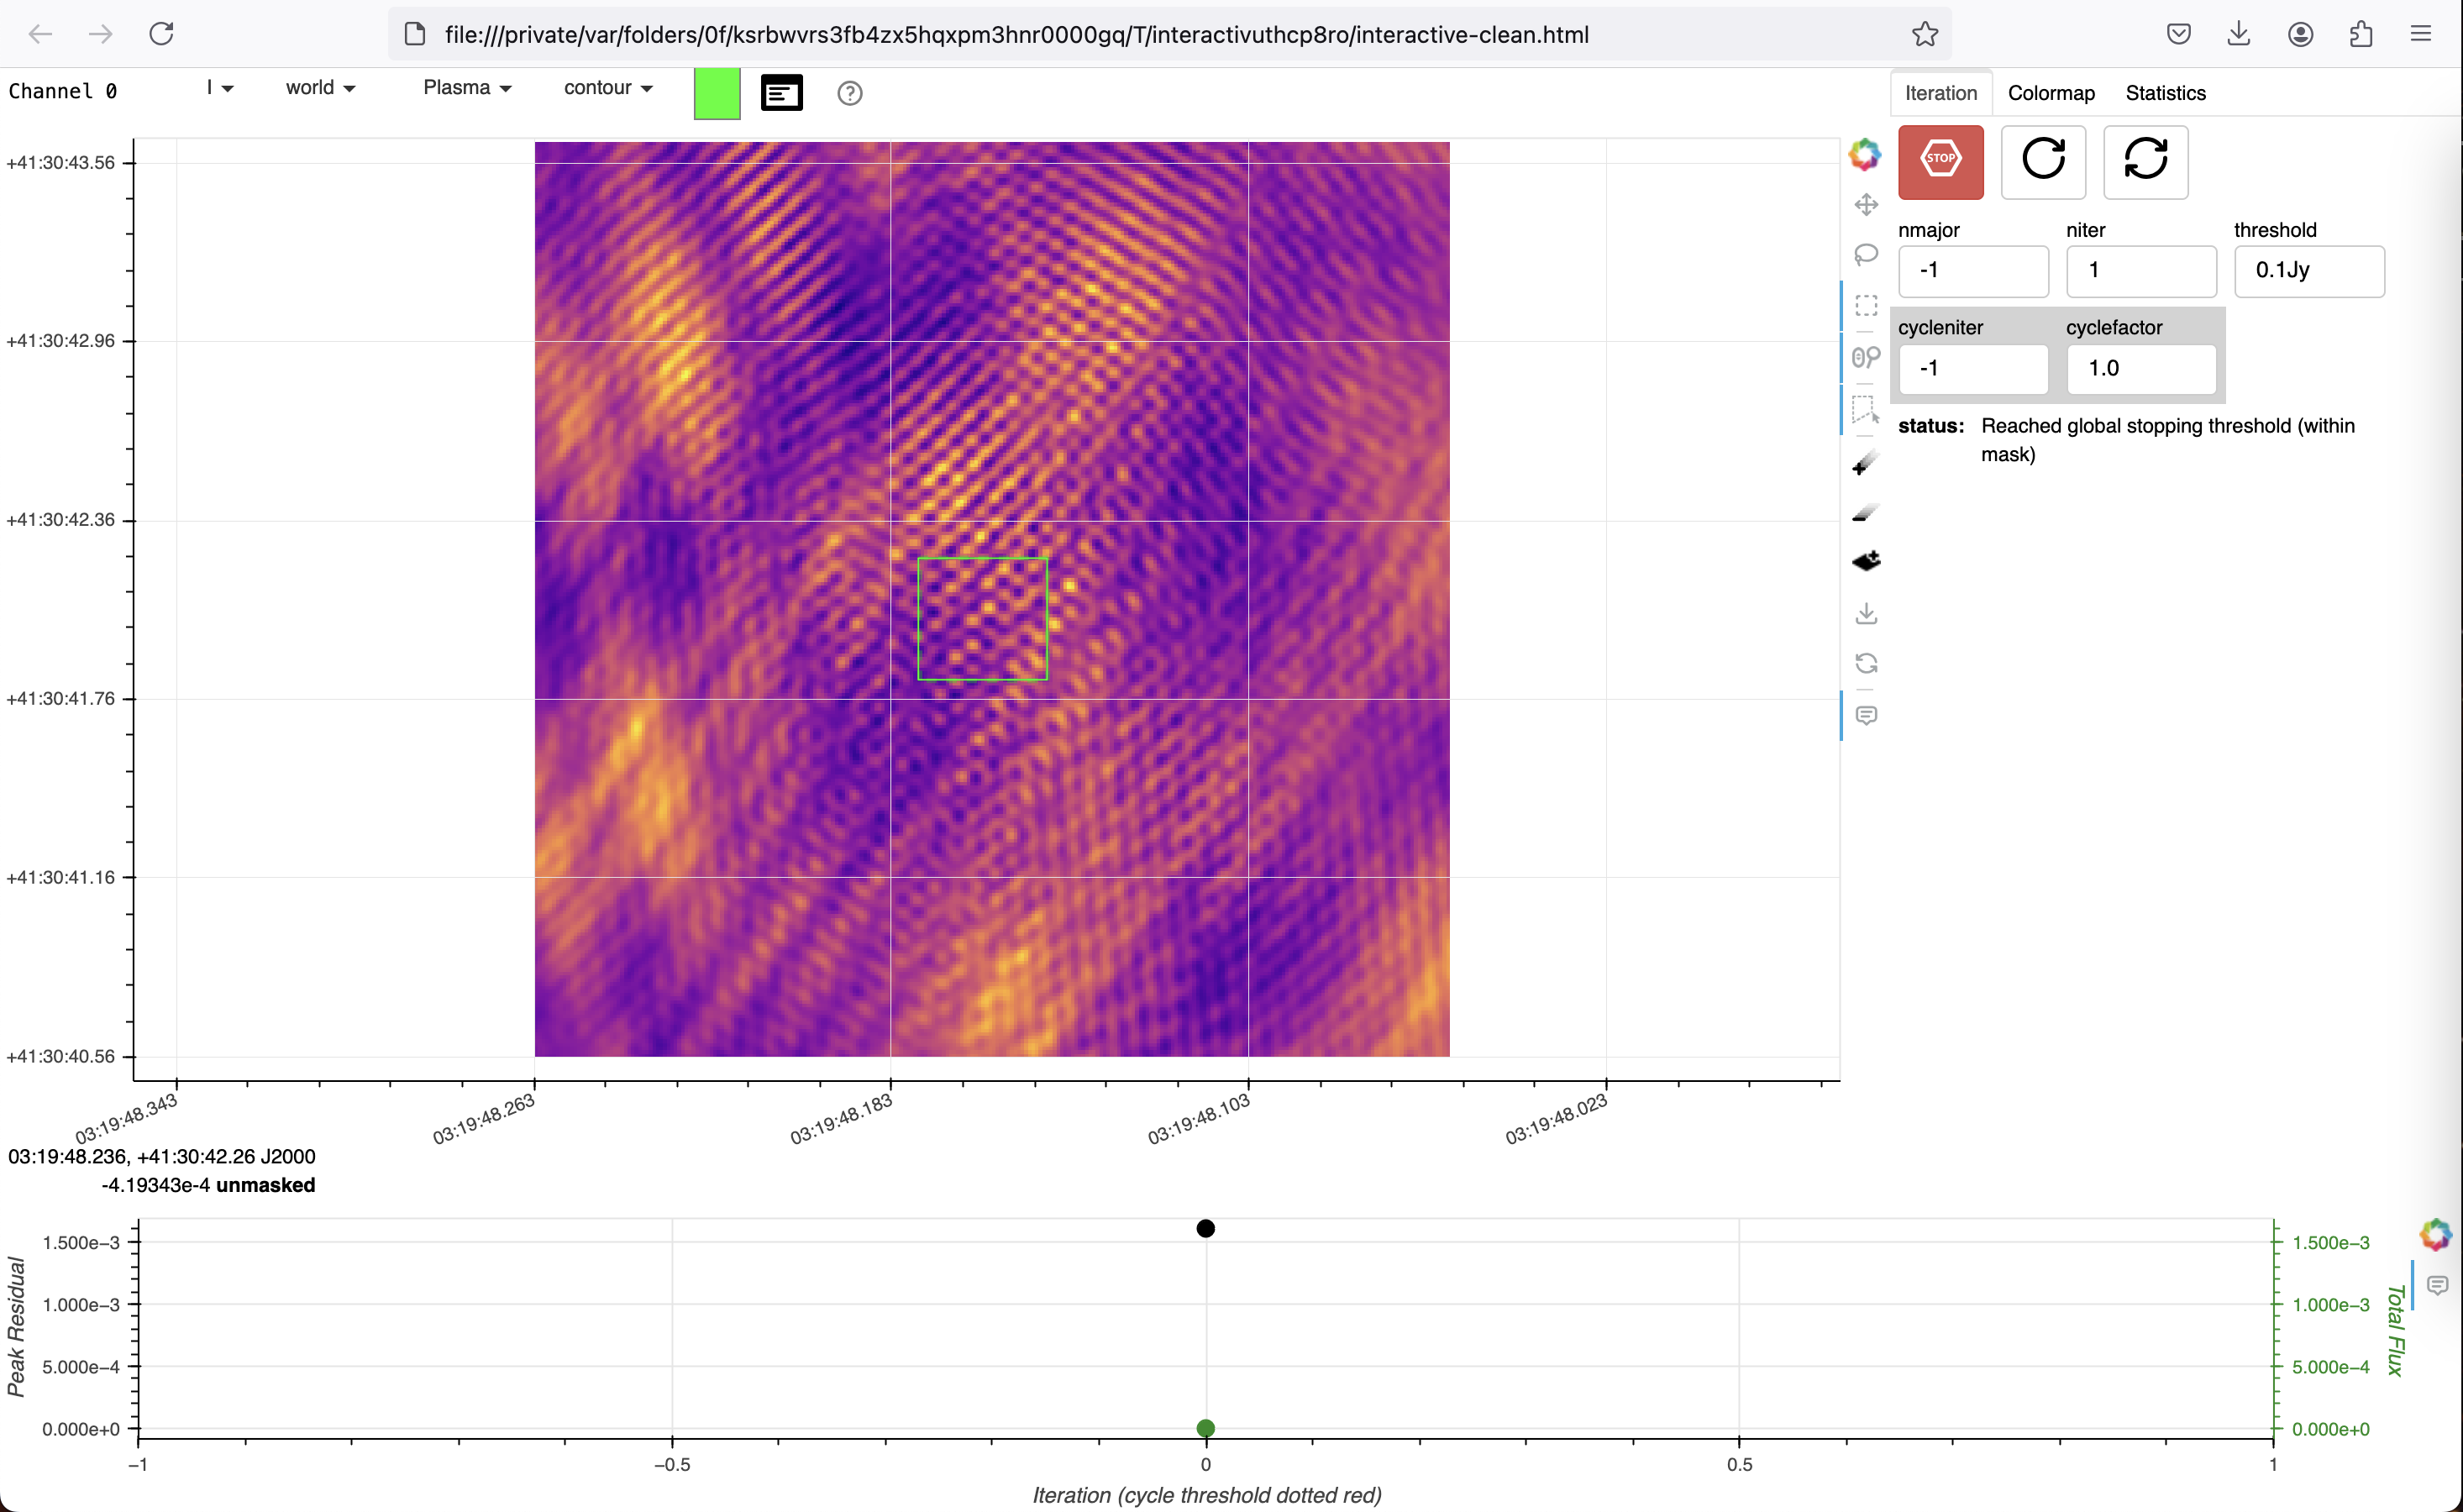
- Next we wish to test the casagui, which is used to do interactive cleaning. Return to your CASA prompt/terminal and copy the following commands.
from casagui.apps import run_iclean run_iclean(vis='all_avg.ms',imagename='test_casa',spw='0',specmode='mfs', niter=1, cell='0.012arcsec',imsize=[256,256],field='0319+4130') - If it works properly, you should have a web browser session that looks similar to the figure below.
- Left click on the box select and drag a box across the image and press
ato make it a region (as shown in the green box below) - Press the circular arrow to check that cleaning is working properly. The status should state 'Reached global stopping threshold (within mask)'
- Click the stop sign to stop the deconvolution.
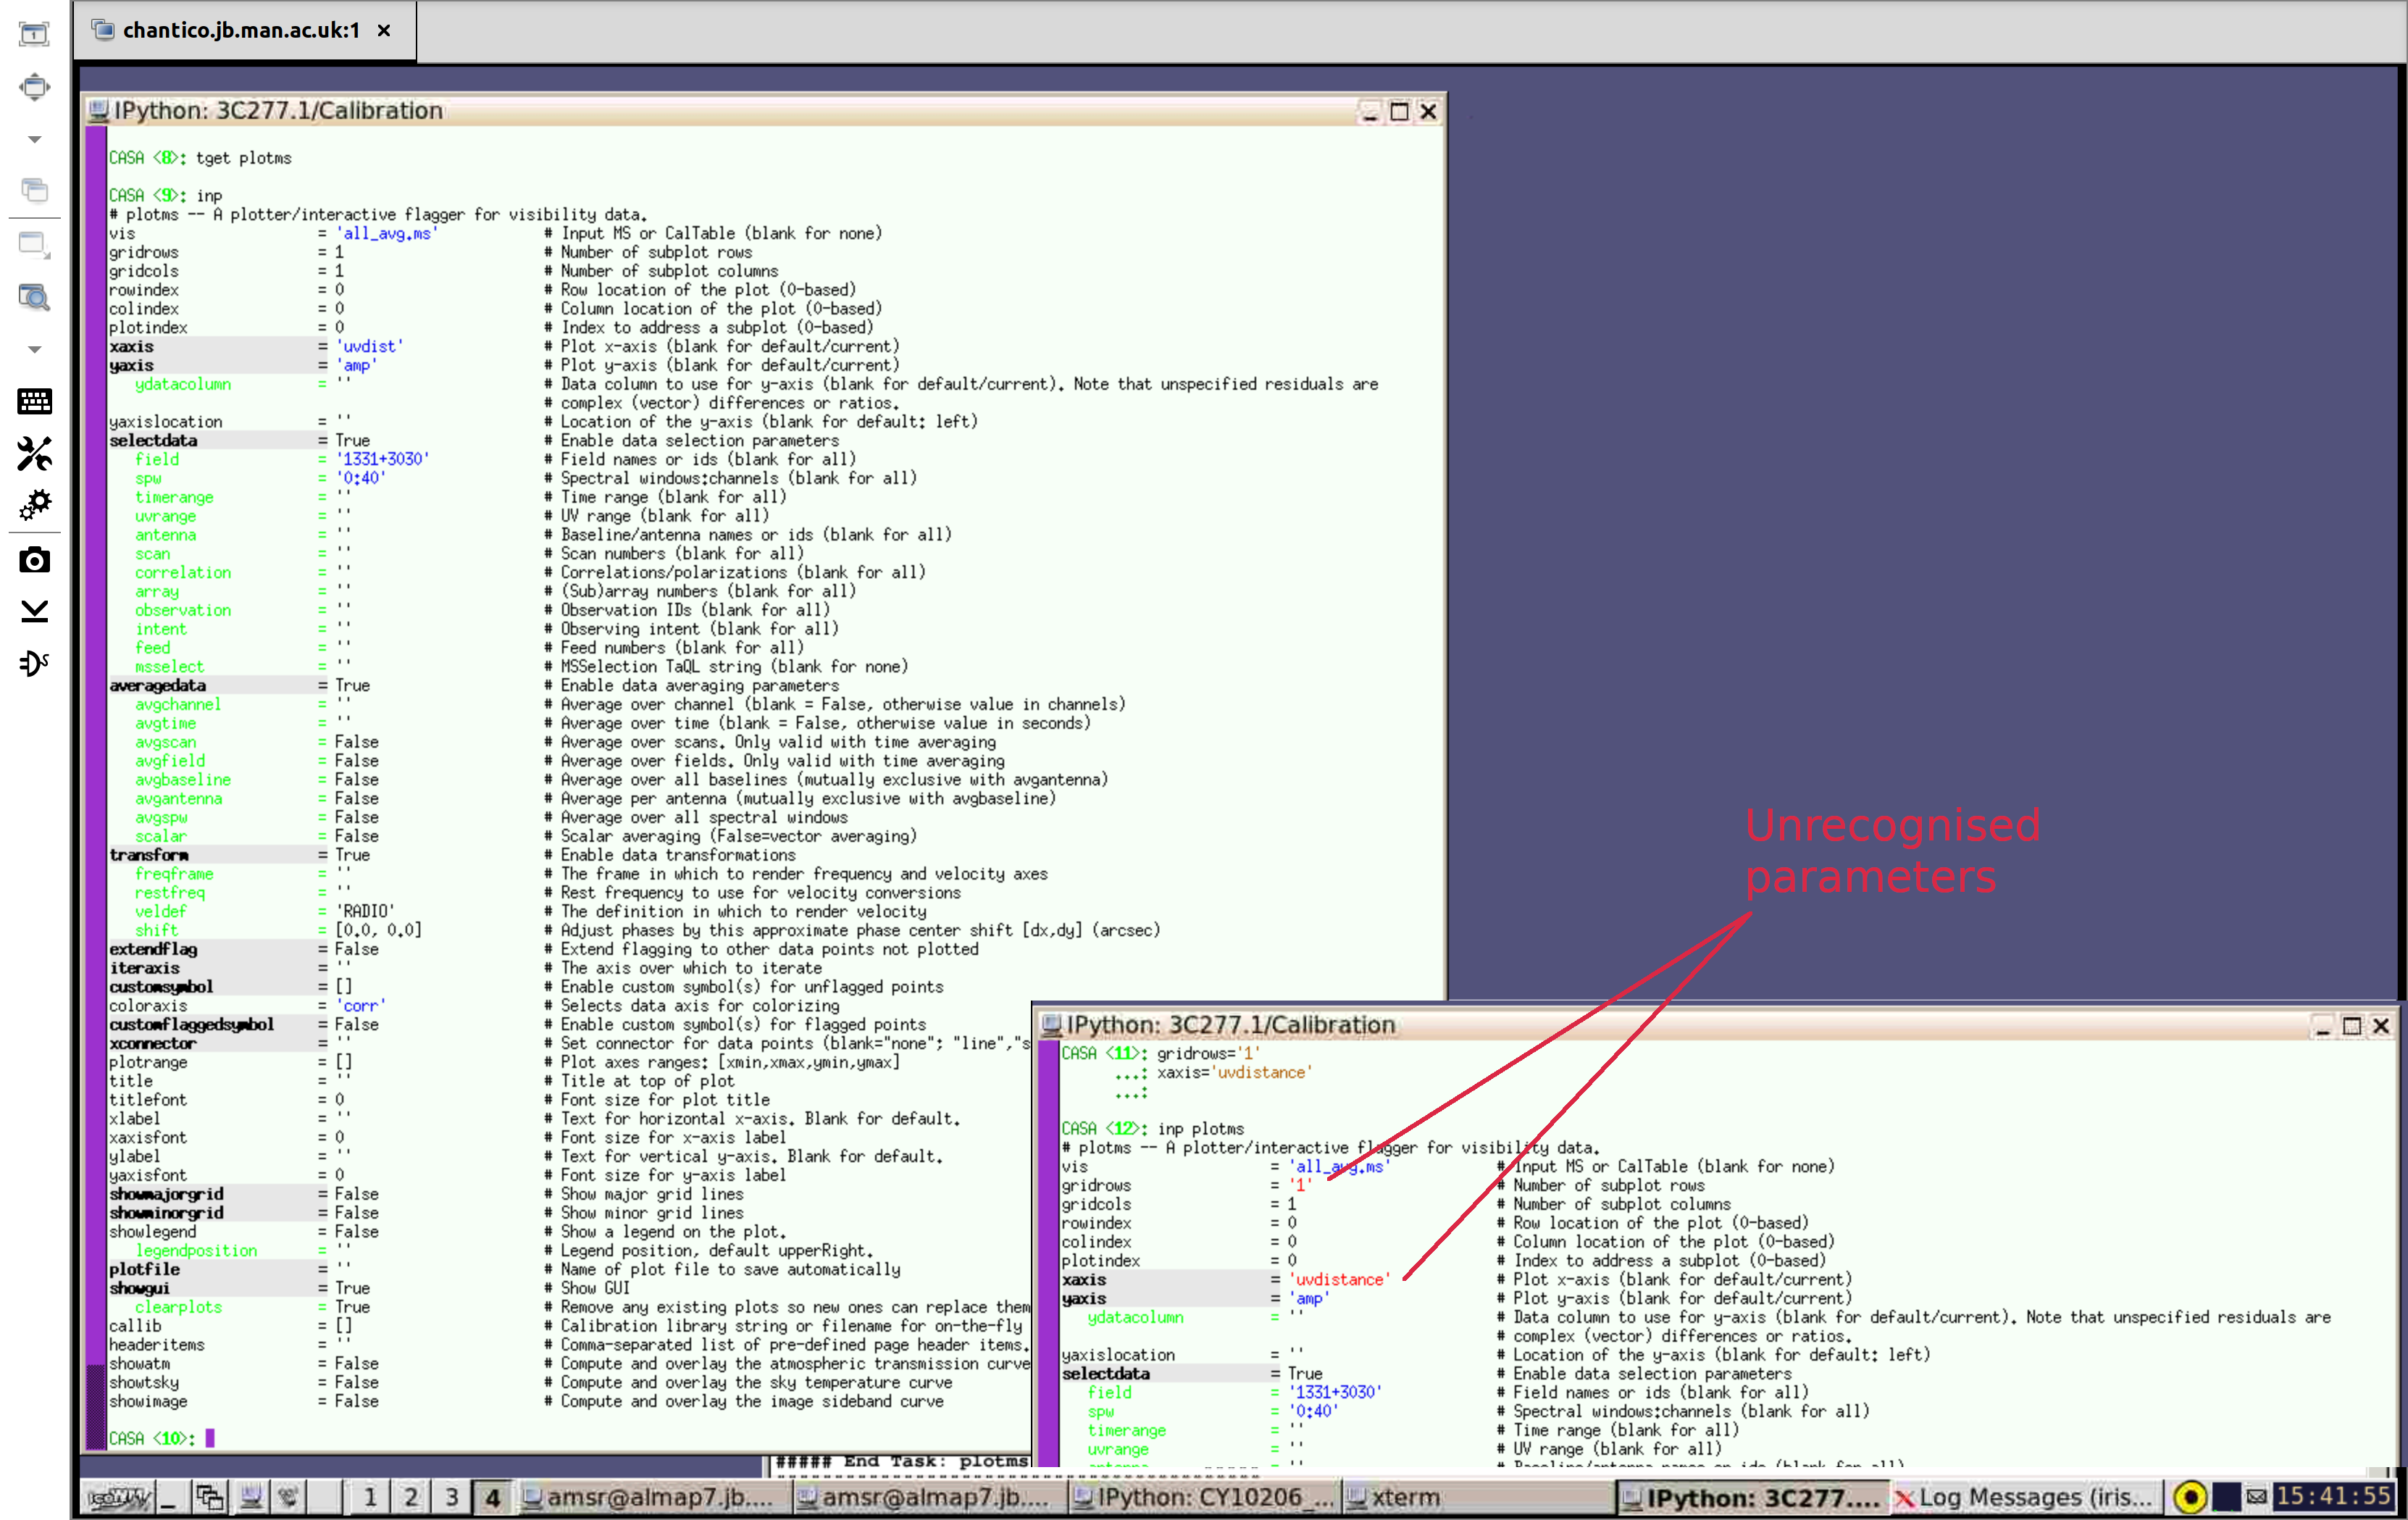
Checking CASA parameters
For this section, we shall inspect the CASA prompt and explain how to enter parameters into CASA tasks. This is of vital importance for the upcoming tutorials. Please follow the below instructions
- In the CASA terminal enter
tget plotms. This restores the last time you ran the task - Enter the command
inpwhich shows the inputs of that task. Nb. you may need to scroll up to see all the parameters. You should see that all parameters are defaults or valid values in blue (as in the left side of the figure below) - Enter as separate lines,
gridrows='1'
xaxis='uvdistance'
inp plotms
These values are in red (as in the left of the below figure) to show errors:
gridrowsshould be a integer like1, not a string like'1'xaxisis a string, but the allowed values do not include'uvdistance', only the abbreviation'uvdist'
- If you re-enter the correct values and enter
inpagain, they should be blue again. Nb. if entering each parameter manually/separately, in the CASA terminal like this, don't put a comma at the end of the lines. - Once the inputs are correct, you can run the task manually by typing its name, e.g. plotms. In the tutorial you will see alternative ways to run the tasks such as from a script.
Finally, if you need more information on any task, type e.g.,
help plotmsor see the documentation on the CASA web page: https://casadocs.readthedocs.io/en/stable/